Playing with wood is much more enjoyable than playing with other people’s toys. Playsets with swings and slides and turret-style structures are great for children to have hours and hours and hours and hours and hours and hours and hours and years of fun. But to keep them looking nice and protected from the elements, you need to stain the playset.
It may feel like an intimidating project, but stain it to make it look good and keep it safe. If you stain your wooden playset, it’d be worth it in the end, as it’d protect it from the elements and also add to its beauty.
This section explains how to stain a wood playset step by step. If you do what is listed here, you can finish staining wood in a very short time. It gives the appearance that the wood is beautiful and it offers a nice protective layer.
If you follow the steps below, you will be able to save yourself a lot of time and be able to do more work that you would normally do if you did not follow them. Planning ahead can cause you to work a little more slowly, but it really is worth it! Plans for what you will do when you come home from work and then works out the plans that you make.
Table of Contents
Give Your Kids Other Spots to Play
If you have children who play on a playset every day, this is a perfect time for grandma to see you. It is dangerous to have your kids under your feet while you try to stain them. Anyone who wants to go somewhere different to go to for a couple of days will appreciate having a place that is not their place to go.
Check the Weather
You will need a good amount of dry weather in order to stain your playhouse and enable the wood to dry completely. If you work late at night or have to wash after painting or sealing a product, you will waste both time and money.
Dress Accordingly
When you are applying paints, splatters, or other stains, do not put on clothes that will allow you to get stains on your clothes. Use special gloves that are made for painting or staining wood or plastic playsets to help prevent staining your clothes. If something spills on your T-shirt or jeans, it is not a tragedy. If stains are going to be on things in the future, use a hair bandana to cover the place where the stain will be and not stain the wood.
Remove All Accessories
If you try to remove swings and slides or anything that allows you to slide a tool across the playset to secure it, you will have difficulty putting that playset back together or moving parts about it. When you are done drilling away at your playset, be very careful about storing all the nuts and bolts that you take out in a bag, and reseal any large parts that you have taken apart. This will save you from having to replace them later when it comes time to reassemble the playset. If you have a power screwdriver handy, that will help you to get some good marks on the wall when you remove the screws and nut from the playset, and it will also save time when it comes time to put the pieces (if any) that were removed in the first place.
Getting a good quality tool that can screw up any of those screws is going to help you get the job done quicker, but any good set of tools that include a couple of screwdrivers, pliers, and wrenches should do.
Clean the Playset
Stain will not stick well to wood that is dirty or dusty. Cleaning dirty or damp play structures with a 50/50 solution of water and bleach in a pressure washer is the best method for keeping them safe. It will be easy to make certain all the surfaces of the playset are completely dry, so no more mold or mildew will grow. Wait until the playset is fully dry before staining it.
If cleaning with a regular household pressure wash system is not an option, then it may be easier to use a bucket and mildew-removing bleach and water, a scrub brush, and a garden hose. This process is difficult to do because it involves more work. Make certain that all of the nook and cranny areas are cleaned, and that the water is fresh, and that your playset is dry and firm when you first stain it.
Filling In Cracks and Holes
Any cracks or holes in the wood can be filled with wood putty as you prepare your wooden playset for staining. That will strengthen the wood and extend the life of your playset.
Sand Down Any Rough Areas
There is nothing that ruins a wonderful afternoon with a child that gets a very nasty splinter. Prevention of injuries from accidents and playing with your children’s playsets by sanding any uneven areas of wood (or any other wood that looks uneven) with fine grit.
Cover Your Work Area
If you do not want stains on your work area, put down a tarp to protect it. You can easily stanch areas that you do not want stashed by covering them with pieces of paper. If you decide not to stanch an area, use a tarp to protect it.
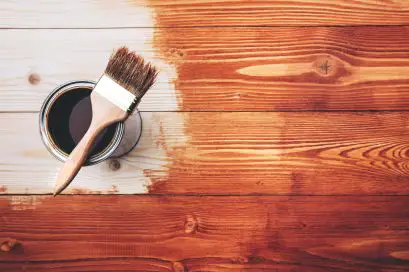
Stain It
Now we get to the part that is really exciting. Look for a stain that will last a long time and is safe to use. It is important to consider both the appearance and function of different stains. You will also need some ideas on what color you would like your woodwork to be when you finish it, and if you would like sealant on top of the stain or use it to help prevent it from drying out.
Taking care of your children wood garden toys will prolong their life and help them to look beautiful while you are playing in your yard. If you have a playset that’d benefit from a refresh, have a look at our guide on how to repair a broken swing set.
If you carefully prepare your playset before staining it, the finished product will look nice and look very nice. There will be very little mess involved. If you carefully plan, you will be able to stain the playset very effectively. Soon, all of you children and all of the children’s friends in the neighborhood are playing on a maintained playset.
